OpenRGB Getting Started Guide
In this setup guide, we’ll set up 2 example profiles to get started. For the best results, ensure you have combat logs being saved to a file in the game settings.
- Install and run OpenRGB if you haven’t already
-
You should see a window that looks similar to this that lists your automatically detected RGB devices:

Main OpenRGB window -
Choose a device, select a color and click “Save To Device” to make sure that color changing works.

-
Click the dropdown arrow next to “Save Profile” and select “Save Profile As…”

-
Choose a name for this first profile. “Default” is a good starting point.

-
Next, change the color on the device to a different color. Red or similar color is good for an In-Combat status.

-
Click the dropdown next to “Safe Profile” and select “Save Profile As…” one more time

-
Choose a name for this second profile. “In-Combat” is a reasonable name.

-
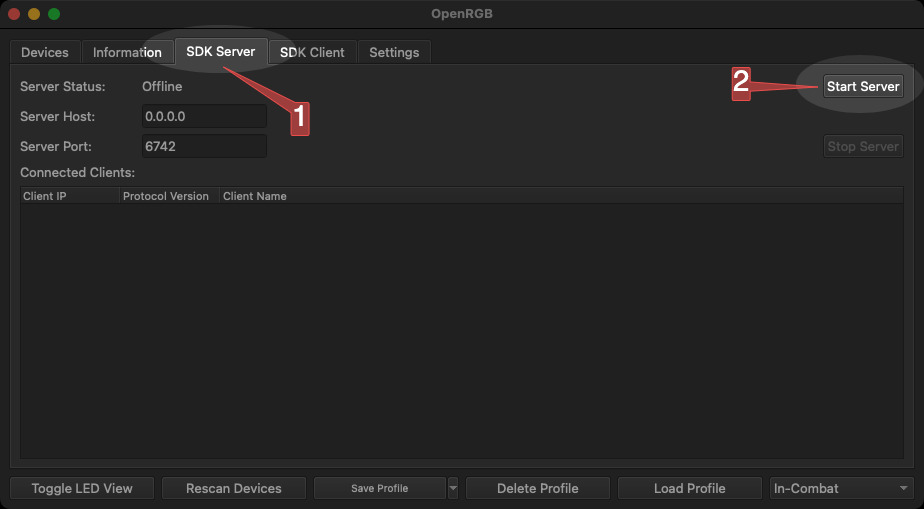
Now enable the SDK Server by clicking the “SDK Server” tab at the top of the window and clicking “Start Server”. You can leave the default settings.
-
Install and launch TOR HUD if you haven’t already

-
Ensure you have combat logging enabled in the SWTOR settings.

-
In the main TOR HUD window, click the “OpenRGB” menu option on the l
eft navigation bar.

-
Click the “Enable OpenRGB Integration” toggle.

- The status should now change to “✅ Connected”
-
Under Profile Configuration, click the dropdown next to “Default Profile” and select “Default” or the name of the profile you created in Step 5.

-
This will enable you to select profiles for other triggers. Click the dropdown next to “In-Combat” and select the “In-Combat” profile or the name of the profile you created in Step 8.

- Back in the game, go attack an enemy to enter combat. You should see your RGB change!


This is just a tutorial to get you started. Feel free to play around with the different triggers and customize your OpenRGB profiles to your liking.